Constraints are a necessary feature to understand in Figma when you're dealing with a design that must be replicated across multiple device frames. The proper usage of both constraints and auto-layout will help you save a tremendous amount of time and energy. This is because constraints help automatically position your UI elements when those elements or the frame itself are resized.
Would you rather watch a video on Figma constraints?
The following tutorial is based on the video above. So, let's get started!
What do Figma Constraints do?
In a nutshell, constraints instruct objects how they should respond when you resize their frames.
Without constraints, when resizing a frame, the layout will break significantly:

And an example with proper constraints applied:

Constraint Basics
Constraints appear when you select an element, in the property inspect on the right column of the Figma layout, as shown below:
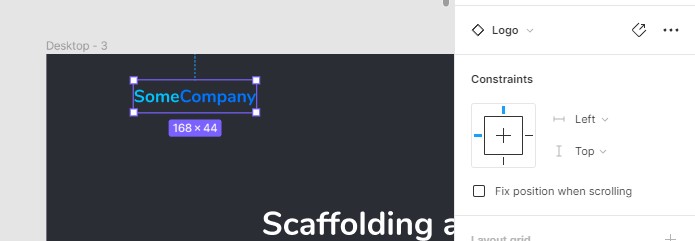
As you can see, a dashed line appears based on the object based on the constraint settings that have been applied.
Here are the following settings that are made possible through constraints on the horizontal axis:
- Left or Right
The element will stick to either the left or right of the frame without affecting the object's size. - Left and Right
The element will be effected by both the right and left side of the frame, and the object may grow or shrink on the horizontal axis. - Center
The element's position will stay the same, based on the horizontal center of the frame. - Scale
Change the object's size and position as a percentage of the frame.
As for the vertical axis, all things remain the same as above, except they're applied vertically.
I suggest experimenting by selecting a single object and selecting the various horizontal and vertical constraint settings. While it may not seem to make sense based on their use cases, they all have their applications when you get into real-world UI scenarios.
Constraints and Resizing
Sometimes, you may see the Constraints label change to Constraints and resizing in the property inspector.
This occurs when you've applied an auto-layout to the selection.
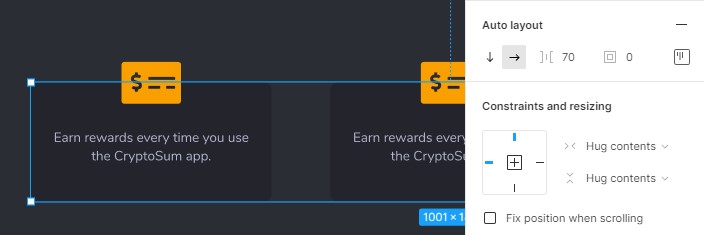
When you select either of the drop downs (horizontal and vertical), you will see a dropdown like this:
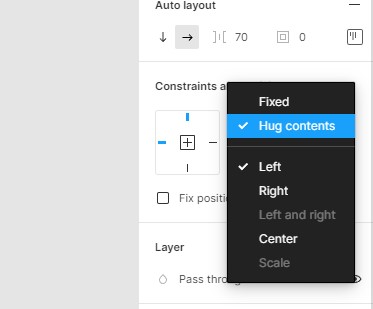
At the top, we have two options to choose from: Fixed and Hug Contents.
- Fixed will ensure that the frame's size will stay the same regardless of the objects inside of them.
- Hug Contents will resize itself based on the objects inside of them.
Making Objects Responsive when a Frame is Resized
This is a two step process that involves using both constraints & resizing, along with auto-layout.
- Select the objects (typically a row or column of objects) and apply auto-layout.
- Change the new frame's constraints and resizing section to "Fixed" and "Left & Right".
- Select all of the objects inside of that frame and change the resizing section to "Fill Container"
This 3 step process is invaluable for allowing you to easily translate objects from one frame to another.